ドットで線を描く
「2Dグラフィックスのしくみ」という本が面白かったです。メモリのデータはどのように画面に表示されるのかという話がわかりやすく書いてあります。2次元に並んだピクセル上に直線や円を表示したりベジェ曲線を描いたり、画像を加工したりペイントツールの仕組みの話があったり。

この記事では直線を斜めに描くのと、ベジェ曲線を描くのをJavaScriptで実装してみました、という日記です。
See the Pen Dot Line by kariyayo (@kariyayo) on CodePen.
直線。
See the Pen Dot Bezier Curve by kariyayo (@kariyayo) on CodePen.
曲線。
直線を描く
Canvasにドットを打っていくことにします。
<body>
  <canvas id="canvas" width="400" height="400"></canvas>
</body>
const canvas = document.getElementById("canvas");
const context = canvas.getContext("2d");
まず、ドットを打つ関数を用意する。見やすいように1ドットの大きさを10ピクセル*10ピクセルとする。
/**
 * @param {int} x
 * @param {int} y
 * @param {object} color - {alpha: float, red: int, green: int, blue: int}
 */
function setDot(context, x, y, color) {
  context.fillStyle = `rgb(${color.red},${color.green},${color.blue})`;
  context.globalAlpha = color.alpha; // 透明度
  context.fillRect(x*10, y*10, 10, 10); // 10ピクセル*10ピクセルの大きさの矩形をドットとみなす
}
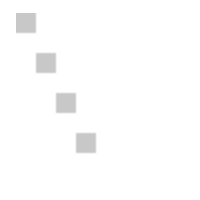
例として、 (0,0) ~ (4,3) の直線を引くことにする。直線を斜めに描くため2マスに跨ってしまうドットがある。具体的には (0,0) , (1, 3/4), (2, 6/3), (3, 9/4) , (4, 3) の5つのドットを打つことになる。これらのドットのうち、例えば (1, 3/4) は (1, 0) と (1,1) に跨ってしまう。
こういうドットは四捨五入してどっちかのマスに寄せることにする。
結果はこういう感じ。

// (0,0) ~ (4,3) まで線を引く
const x1 = 0;
const y1 = 0;
const x2 = 4;
const y2 = 3;
const deltaY = (y2 - y1) / (x2 - x1);
let y = y1
for (var x = 0; x < x2+1; x++) {
  const intY = Math.round(y);
  setDot(context, x, intY, {alpha:1.0, red:200, green:200, blue:200});
  y = y + deltaY;
}
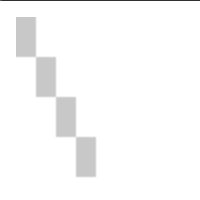
しかし、x軸方向に1ずつ増やす処理にしているため (0,0) ~ (3,6) のように縦長だとうまくつながらない。
ちょっと改造するとうまくいく。
// (0,0) ~ (3,6) まで線を引く
const x1 = 0;
const y1 = 0;
const x2 = 3;
const y2 = 6;
const deltaY = (y2 - y1) / (x2 - x1);
let y = y1;
for (var x = 0; x < x2+1; x++) {
  const intY = Math.round(y);
  setDot(context, x, intY, {alpha:1, red:200, green:200, blue:200});

  // 縦が足りない部分のドット
  const nextY = Math.round(deltaY * (x + 1));
  for (var cy = intY+1; cy < nextY; cy++) {
    setDot(context, x, cy, {alpha:1, red:200, green:200, blue:200})
  }
  y = y + deltaY;
}
(5,5) ~ (40,15) のように、ちょっと長い直線を描くとガタガタになる。
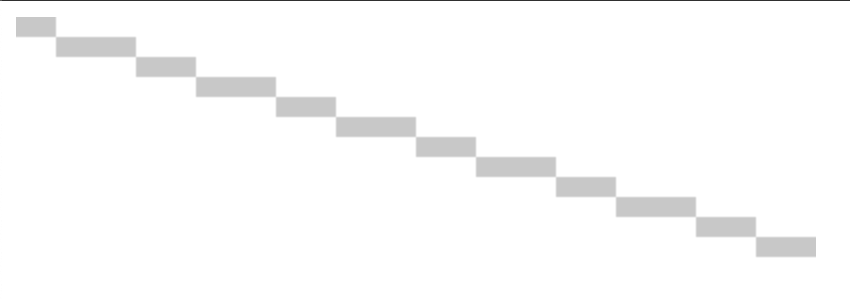
そこで不透明度を使ってアンチエイリアシングする。
intY を求めるときに四捨五入( Math.round() )ではなく切り捨て( Math.floor() )して、差分 y - intY を f として求める。そして、 1 - f を不透明度とする。つまり差分が少ない=ドットが2つのマスに跨っていないほど、不透明度が1.0に近づくようにする。

// (5,5) ~ (40,15) まで線を引く
const x1 = 5;
const y1 = 5;
const x2 = 40;
const y2 = 15;
const deltaY = (y2 - y1) / (x2 - x1);
let y = y1;
for (var x = 0; x < x2+1; x++) {
  const intY = Math.floor(y);
  const f = y - intY;
  setDot(context, x, intY, {alpha:1-f, red:200, green:200, blue:200});
  setDot(context, x, intY+1, {alpha:f, red:200, green:200, blue:200})
  y = y + deltaY;
}
なかなか良い!
縦長だとまた繋がらなくなってしまったのでさっきと同じように改造すると良さそう。結果的にこうなった。
See the Pen Dot Line by kariyayo (@kariyayo) on CodePen.
曲線を描く
次は曲線。ベジェ曲線を描く。名前はよく聞くけど実際どうやって計算してるのかさっぱり知らなかった。
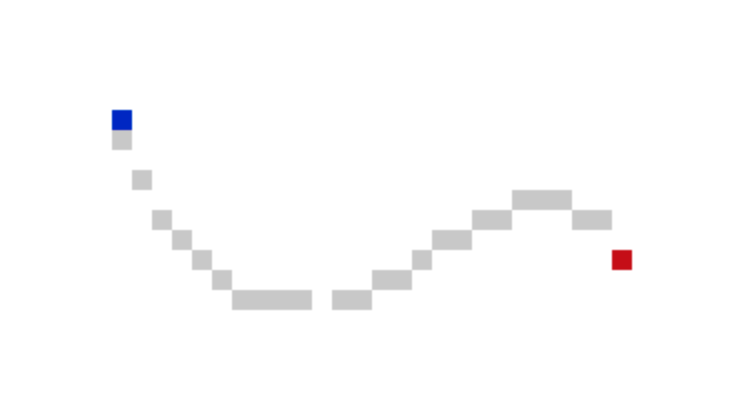
例えば、 (5,5) ~ (30, 12) の間に曲線を描きたい。途中に3点加えた計5点を制御点と呼ぶ。制御点とベジェ曲線の定義を使って曲線を描く。
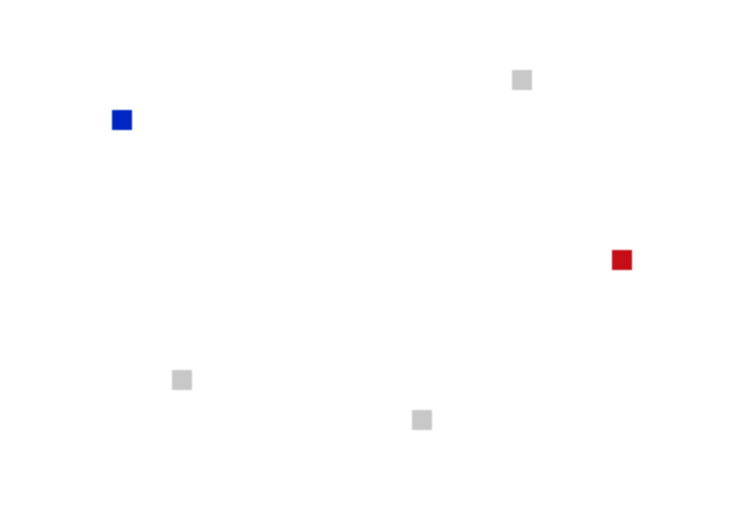
const ps = [
  {x: 5, y: 5},
  {x: 8, y: 18},
  {x: 20, y: 20},
  {x: 25, y: 3},
  {x: 30, y: 12},
];

setDot(context, ps[0].x, ps[0].y, {alpha:1.0, red:0, green:0, blue:200});
setDot(context, ps[1].x, ps[1].y, {alpha:1.0, red:200, green:200, blue:200});
setDot(context, ps[2].x, ps[2].y, {alpha:1.0, red:200, green:200, blue:200});
setDot(context, ps[3].x, ps[3].y, {alpha:1.0, red:200, green:200, blue:200});
setDot(context, ps[4].x, ps[4].y, {alpha:1.0, red:200, green:0, blue:0});
本には具体例の計算式が書いてる。一般化した定義はWikipediaを見てみる。ベジェ曲線 - Wikipedia
x軸を1ずつ増やすたびに t を計算して を使って座標を求める。
はバーンスタイン基底関数と呼ばれる関数。
これらを実装する。
let combi = null;

/**
 * 組み合わせ(nCr)の計算
 */
function combination(n, r) {
  if (combi == null) {
    const pascalTriangl = (n) => {
      const pt = [];
      for (let i = 0; i < n+1; i++) {
        pt[i] = [];
        pt[i][0] = 1;
        pt[i][i] = 1;
        for (let j = 1; j < i; j++) {
          pt[i][j] = pt[i-1][j-1] + pt[i-1][j];
        }
      }
      return pt;
    }
    combi = pascalTriangl(n);
  }
  return combi[n][r];
}

/**
 * バーンスタイン基底関数
 */
function bernstein(n, i, t) {
  return combination(n, i) * (t**i) * ((1-t)**(n-i));
}

/**
 * P(t)
 */
function bezier(ps, t) {
  const n = ps.length;
  const p = ps.map((p, i) => {
      const b = bernstein(n-1, i, t);
      const px = p.x * b;
      const py = p.y * b;
      return {x: px, y: py};
    }).reduce((acc, v) => {
      return {x: acc.x + v.x, y: acc.y + v.y};
    }, {x: 0, y:0})
  }
  return p;
}
この bezier() (ベジェ曲線の定義)を使って曲線を描く。制御点毎に bezier() を使って座標を計算する。
const ps = [
  {x: 5, y: 5},
  {x: 8, y: 18},
  {x: 20, y: 20},
  {x: 25, y: 3},
  {x: 30, y: 12},
];

const start = ps[0];
const last = ps[ps.length-1];

for (var x = start.x; x <= last.x; x++) {
  const t = (x - start.x) / (last.x - start.x);
  let p = bezier(ps, t);
  p = {x: Math.floor(p.x), y: Math.floor(p.y)};
  setDot(context, p.x, p.y, {alpha:1.0, red:200, green:200, blue:200})
}
setDot(context, start.x, start.y, {alpha:1.0, red:0, green:0, blue:200}); // スタート地点は青
setDot(context, last.x, last.y, {alpha:1.0, red:200, green:0, blue:0}); // ゴール地点は赤
結果こんな感じ。線が途切れる。。
今のソースコードだとx軸方向に1ドット t を計算してベジェ曲線の定義で座標を求める。この座標を求める頻度を少し減らすことにする。始点から終点までを短い直線をつなげると考える。例えば、 (5,5) ~ (30,12) の区間を5分割して、5つの直線を繋ぎ合わせて曲線を表現する。そうすることで曲線が繋がるように調整できる。
先ほどの直線を描く処理を drawLine() 関数として定義する。
function drawLine(context, x1, y1, x2, y2, color) {
  const deltaY = (y2 - y1) / (x2 - x1);
  let y = y1;
  for (var x = x1; x < x2+1; x++) {
    const intY = Math.floor(y);
    const f = y - intY;
    setDot(context, x, intY, {alpha:1-f, red:color.red, green:color.green, blue:color.blue});
    setDot(context, x, intY+1, {alpha:f, red:color.red, green:color.green, blue:color.blue})

    y = y + deltaY;
  }
}
5分割してループする。ループ毎に分割された直線を描くためスタート地点とゴール地点の2つの座標を求める。 スタート地点用の t1 とゴール地点用の t2 を計算してそれぞれの座標を求め、drawLine() を使って直線を描く。
const ps = [
  {x: 5, y: 5},
  {x: 8, y: 18},
  {x: 20, y: 20},
  {x: 25, y: 3},
  {x: 30, y: 12},
];

const div = 5; //分割数
const deltaT = 1.0 / div;

for (var i = 0; i < div; i++) {
  const t1 = i / div;
  let p1 = bezier(ps, t1);
  p1 = {x: Math.floor(p1.x), y: Math.floor(p1.y)};

  const t2 = t1 + deltaT;
  let p2 = bezier(ps, t2);
  p2 = {x: Math.floor(p2.x), y: Math.floor(p2.y)};

  // 直線を描く
  drawLine(context, p1.x, p1.y, p2.x, p2.y, {alpha:1.0, red:200, green:200, blue:200})
}
setDot(context, ps[0].x, ps[0].y, {alpha:1.0, red:0, green:0, blue:200}); // スタート地点は青
setDot(context, ps[ps.length-1].x, ps[ps.length-1].y, {alpha:1.0, red:200, green:0, blue:0}); // ゴール地点は赤
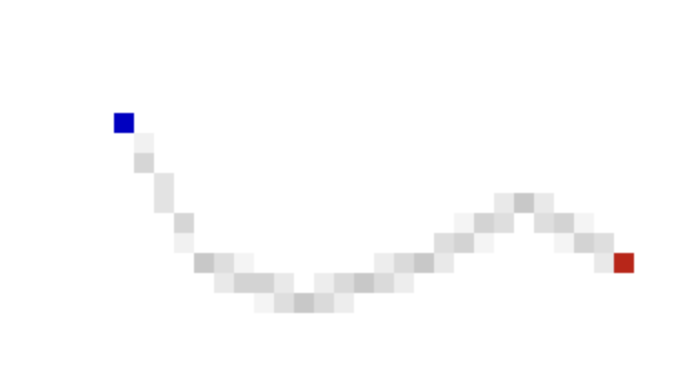
結果的にこうなった。曲線をどれくらい細かい直線に分割するか、というのが重要で、曲線の長さによって調整する必要があるらしい。
See the Pen Dot Bezier Curve by kariyayo (@kariyayo) on CodePen.
おしまい
面白い!けど本当に表層触っただけで沼がとても深そうだなと感じました!
WebAssemblyを触りたかったのでCASL2 Playgroundの実装で使ってみた
以前このブログでも紹介したWebブラウザでCASL2を動かすCASL2 Playgoundですが、バイトコードインタプリタの実装をTypeScriptからC++へ移植しWebAssemblyでJavaScriptから使うように実装してみました、という日記です。
実装してみた理由は、ただWebAssemblyを触ってみたかっただけですw
あと、C++についてほとんど書いたことがないのですが読みたいなぁと思うことがあり、文法を学ぶとっかかりが欲しかったのもあります。例えば、一様初期化というのも読めなかったのですよね。 一様初期化 - cpprefjp C++日本語リファレンス
X x {0};
C++については以下の書籍を読みました。良い本なのか判断できるC++の知識は持ち合わせていないのですが、他の言語を触ったことある人がC++に触れるには良かったように感じました。

WebAssemblyについては以下の書籍を読みました。あまり面白くなかった。。けど、Web上から情報を集める手間なくWebAssemblyにとっかかるには良かったかもしれません。

JavaScriptとC++とのやりとりについては、Emscriptenの公式サイトが良いです。
Interacting with code — Emscripten 3.1.49-git (dev) documentation
変更前
以前の記事で紹介した通り、アセンブル処理をするassemblerと、その結果であるバイト列を解釈して実行するinterpeterを、分割した作りになっている。

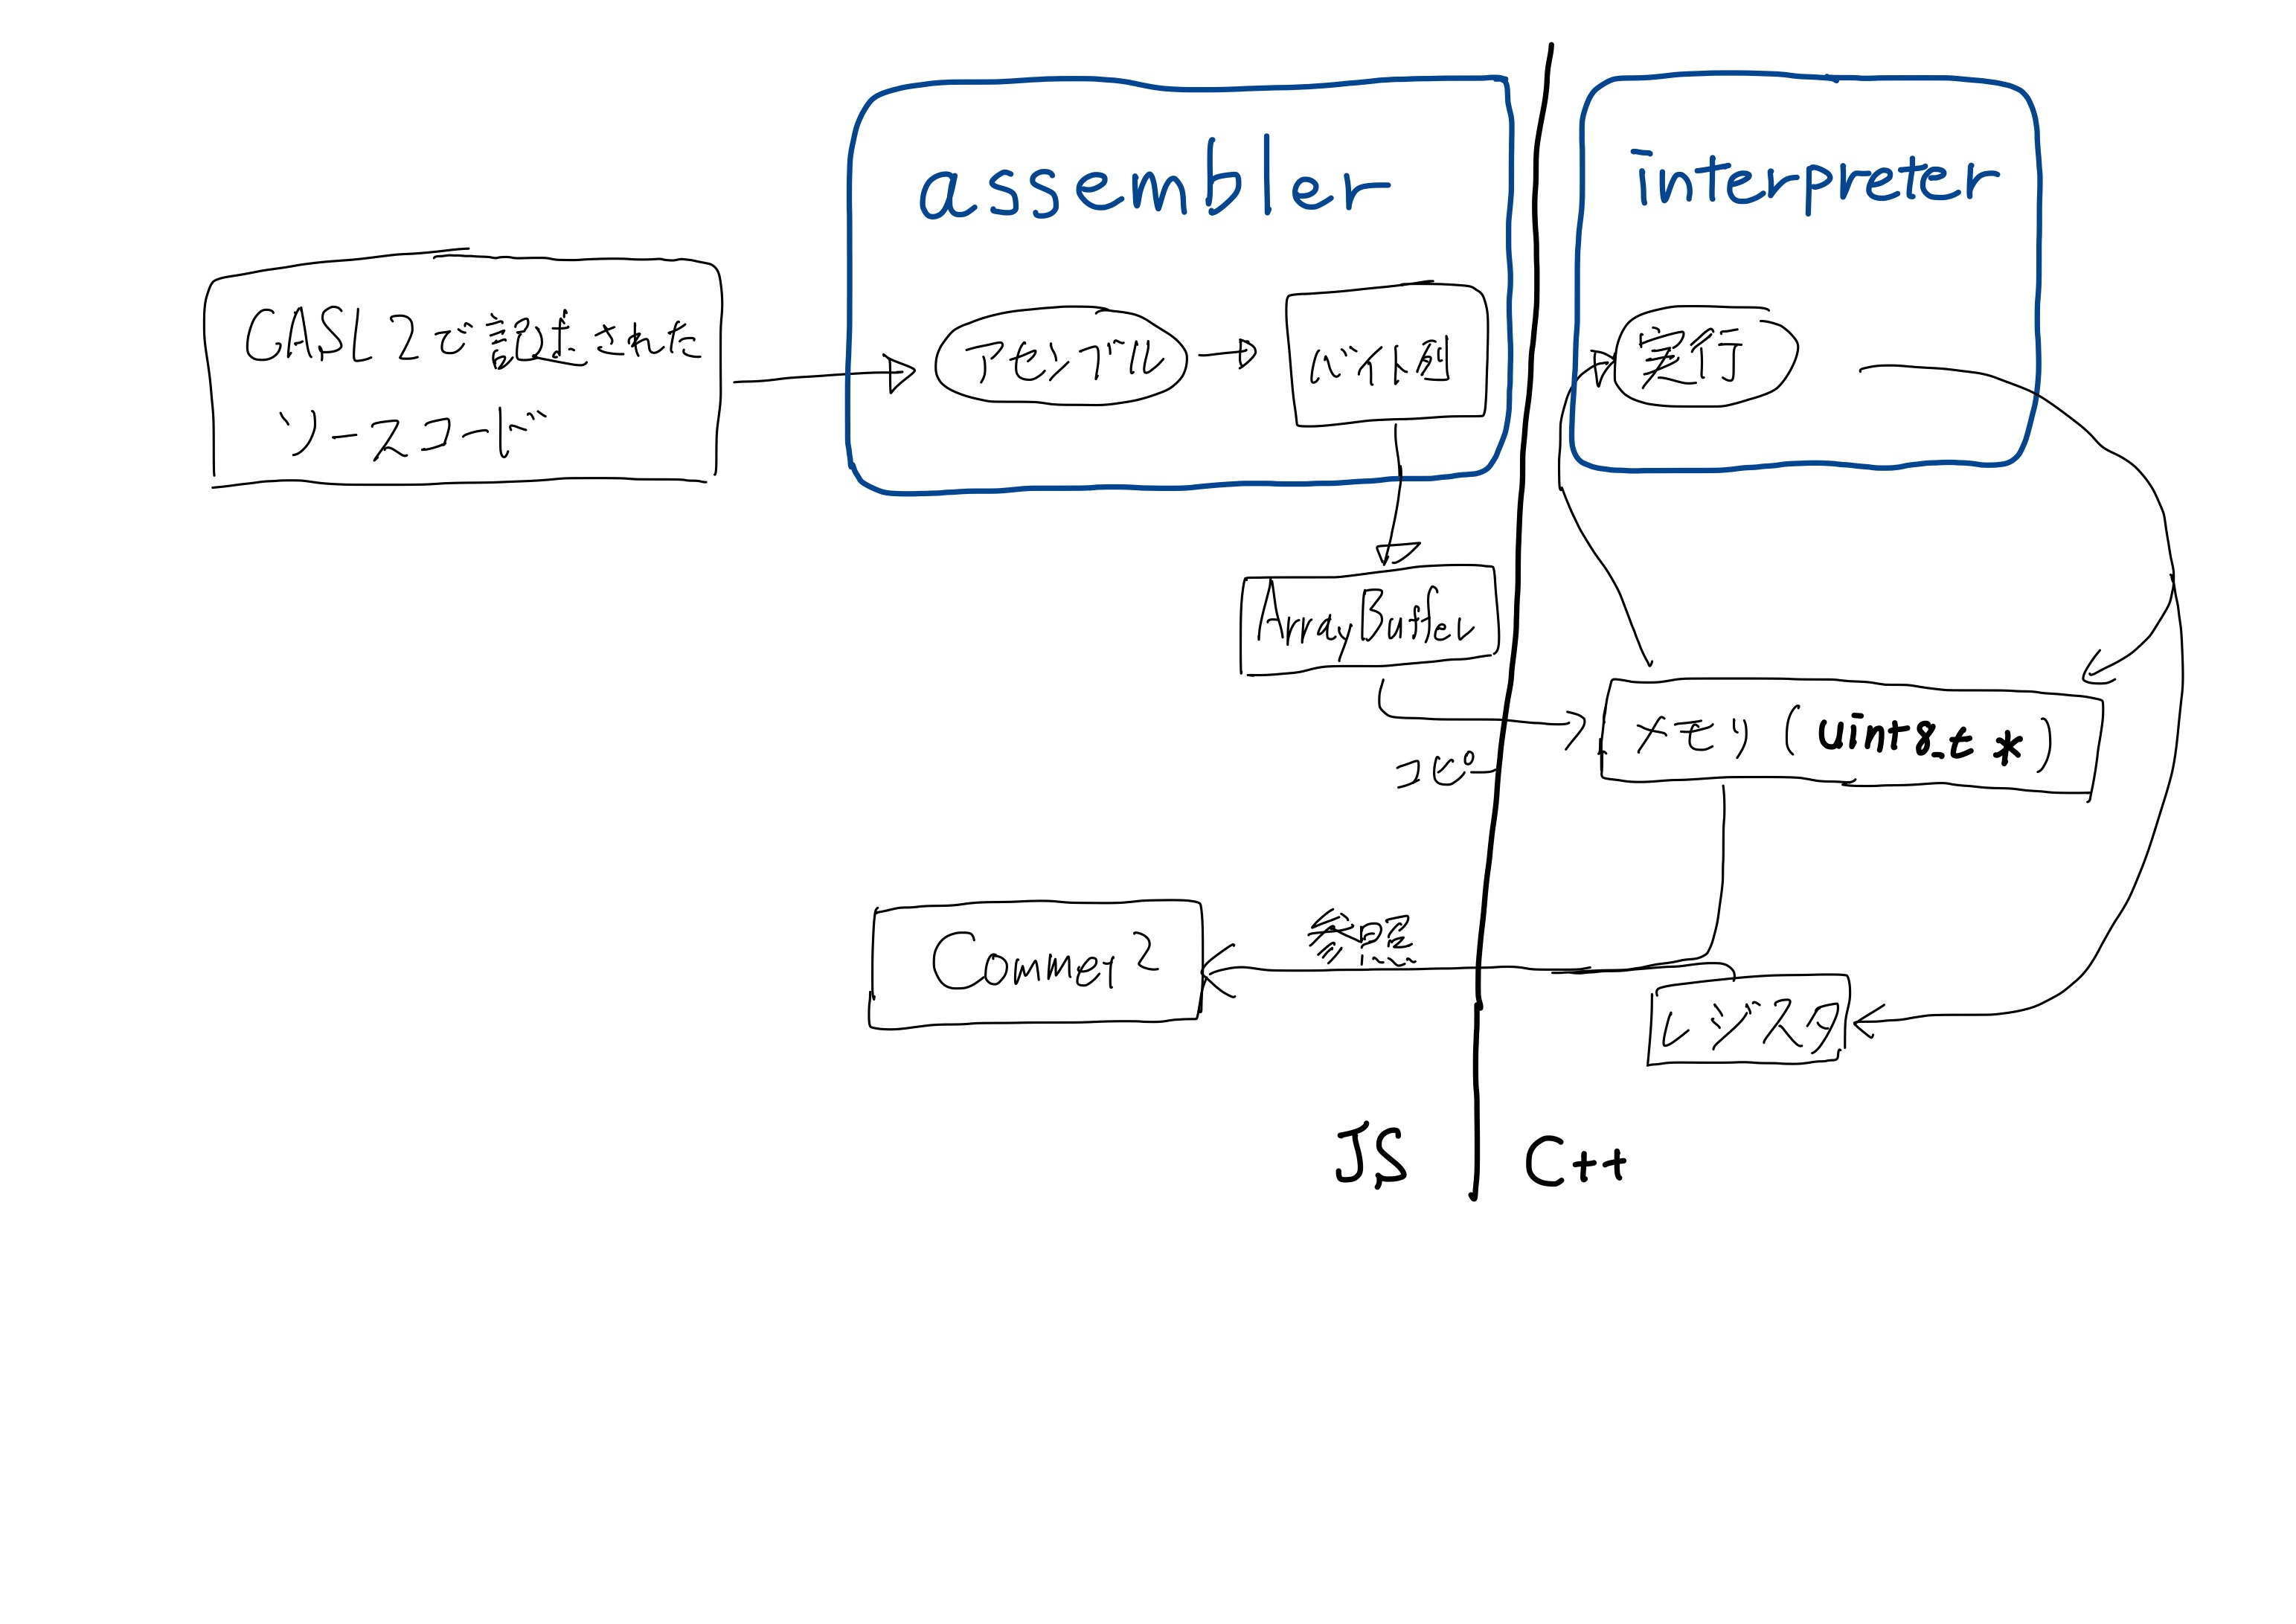
変更後
バイト列を解釈して実行するinterpreterをC++で実装し、JavaScript側でアセンブル処理した結果のバイト列をコピーして渡す方式とする。
wasmファイルの生成
C++ソースコードからwasmへのコンパイルはemccというコマンドを使う。CMakeも使ってみて、とりあえずビルドできたものの、CMakeムズカシイ。。
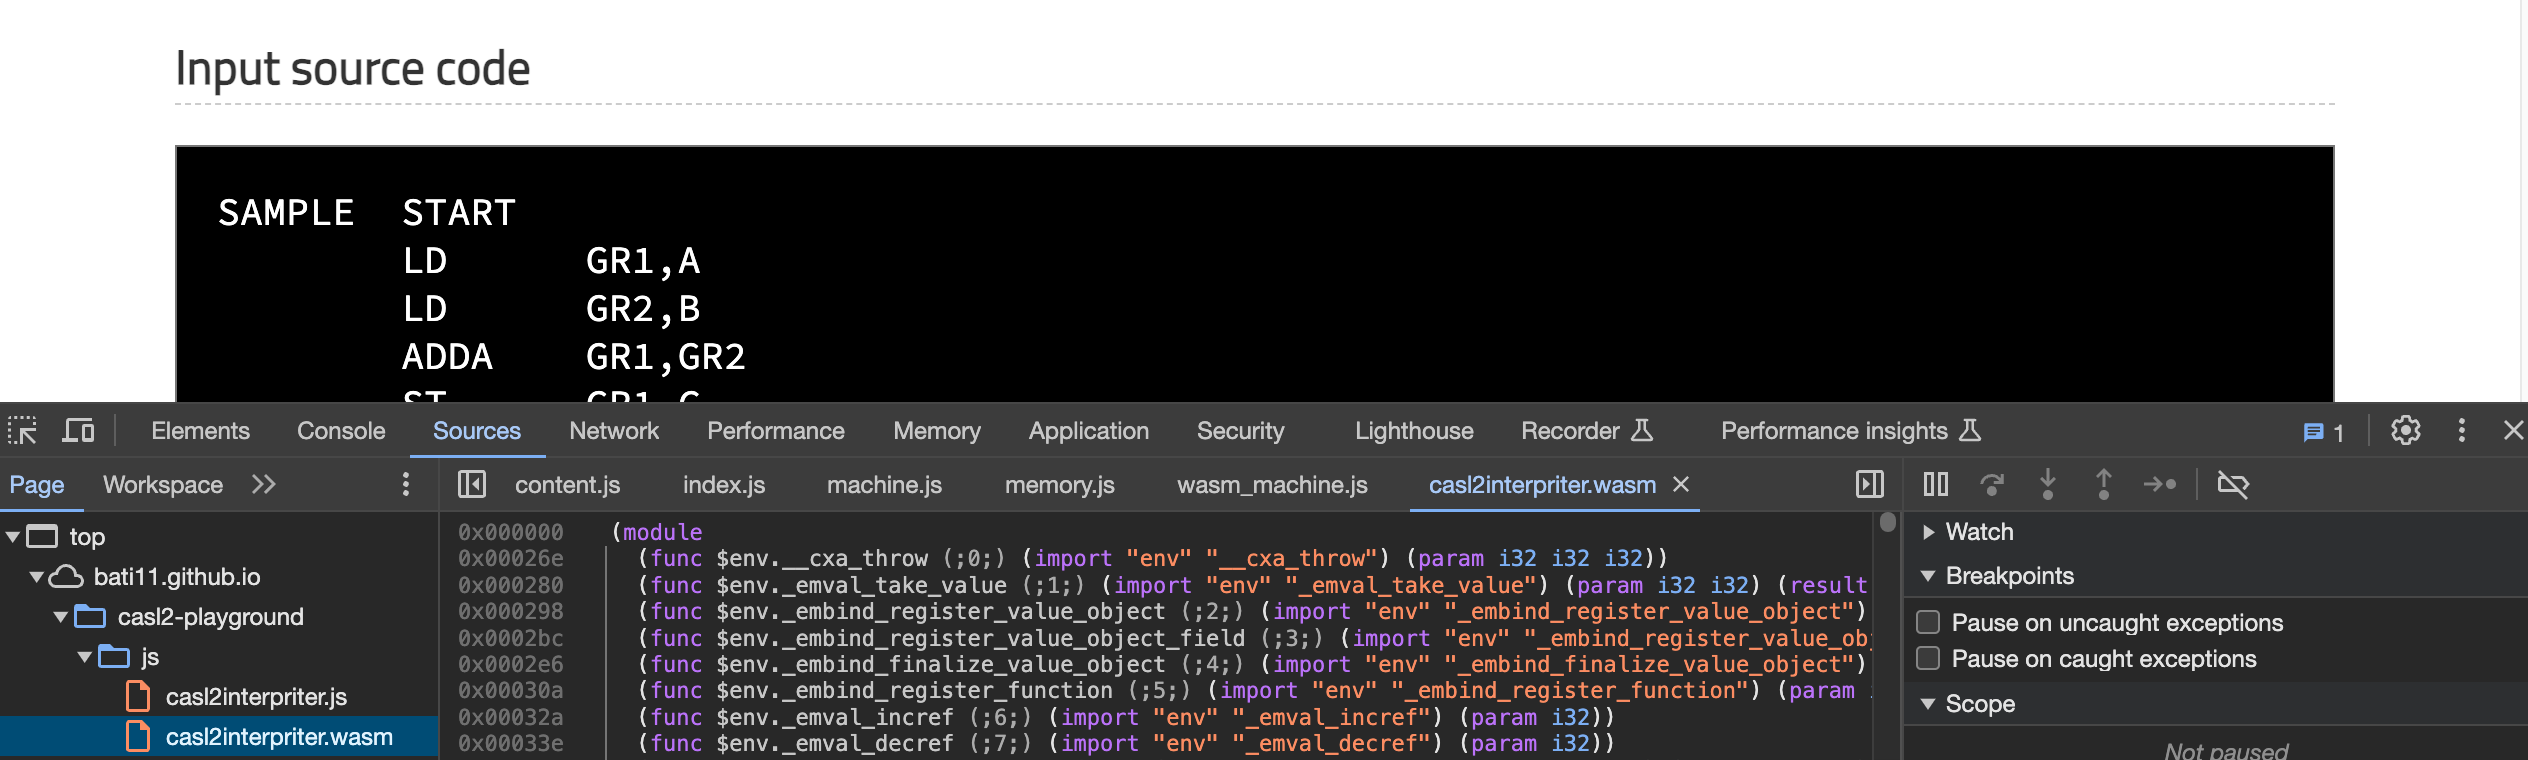
emccによって、wasmファイルとjsファイルが出力される。jsファイルはwasmをダウンロードして使えるようにするためのコードが自動生成されたもの。このjsファイルをHTMLのscriptタグで読み込むようにすればwasmファイルをダウンロードしてくれる。
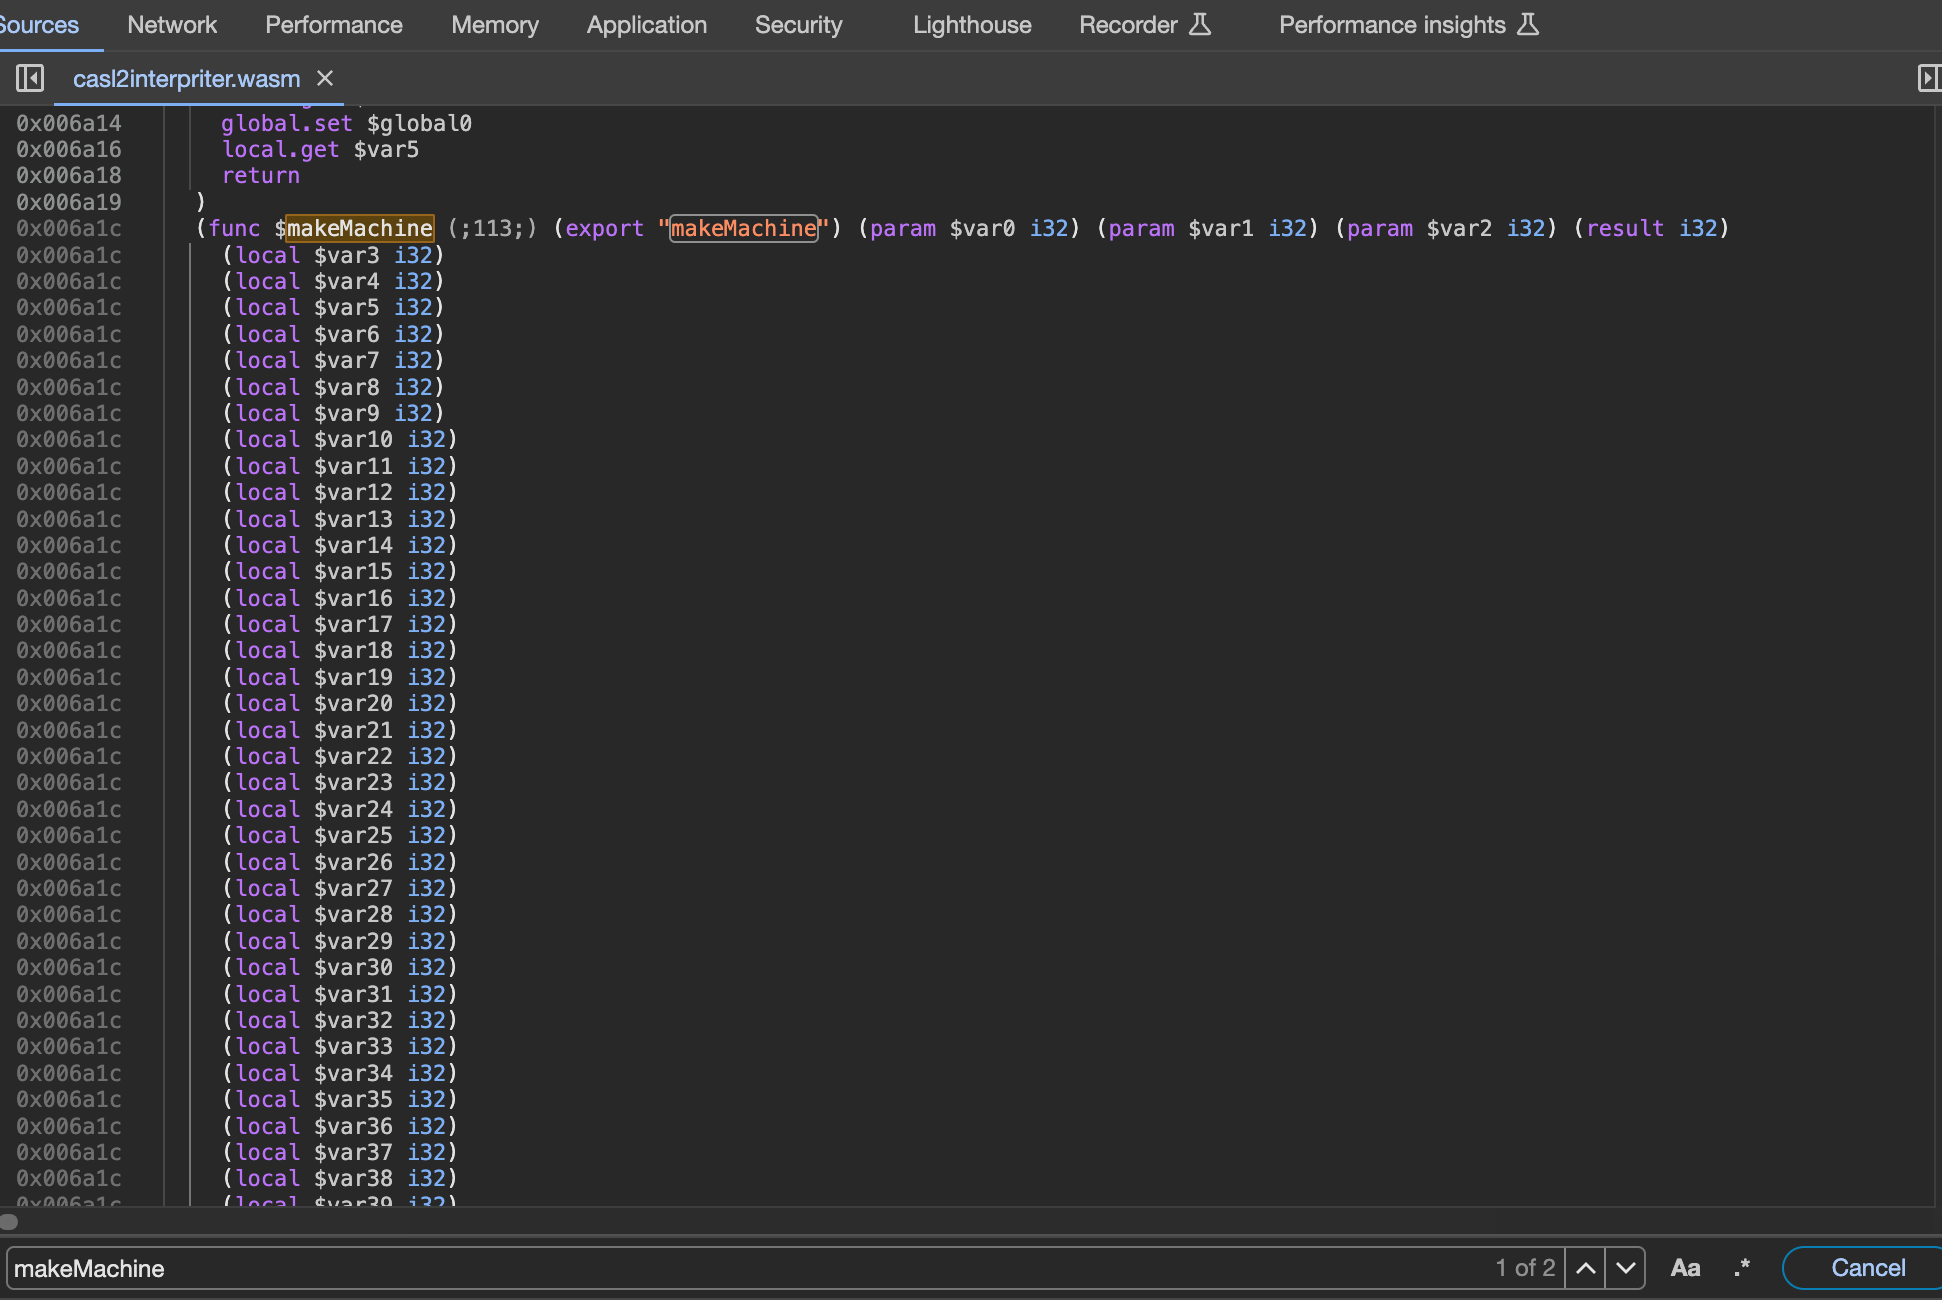
ブラウザのデベロッパーツールでバイナリであるwasmファイルの内容を見れる。バイナリではなくwat形式と呼ばれるテキストに変換したもので読めるのだけど、これが面白い!なんとS式!
JavaScriptからC++の関数を呼ぶ
JavaScriptからC++のコードを呼び出す方法については、2通り使ってみた。
- Interacting with code — Emscripten 3.1.49-git (dev) documentation
- Embind — Emscripten 3.1.49-git (dev) documentation
後者の方がスマートに呼び出せる。だけど、デバッグのしやすさは前者かもしれない??なぜなら、前者の方式だとJavaScript側から呼べるようにしたC++側の関数名がwat形式のテキストに出力されるのだけど、後者のEmbindを使った方式だとC++側の関数名をwat形式のテキストから探すことができない。もしかしたら何か方法があるのかな?それとも現実的にwat形式のテキストを使ってデバッグすることは滅多にないのかな?
例えば、以下のような makeMachine 関数は、wat形式のテキストを検索すると発見できる。
extern "C" {

  EMSCRIPTEN_KEEPALIVE int makeMachine(uint8_t* bytes, int size, int startAddress) {
    ...
  }
JavaScriptからC++へバイト列を渡す
JavaScriptからC++側の malloc を呼び出しメモリを確保、確保したメモリ領域にアセンブル結果のバイト列をコピーする。そしてC++側の関数を ccall で呼ぶときに引数として確保したメモリのポインタを渡す。
// JavaScript

// assembleの結果のバイト列をwasmのメモリにコピー
const arr = new Uint8Array(assembleResult.buffer);
this.pointer = Module._malloc(Uint8Array.BYTES_PER_ELEMENT * arr.length);
if (this.pointer == null) {
  throw new Error("entry_point :: malloc failed");
}
Module.HEAP8.set(arr, this.pointer / Uint8Array.BYTES_PER_ELEMENT);

// wasmの関数を呼び出して初期化
const setupResult = Module.ccall('makeMachine',
  'number',
  ['number', 'number', 'number'],
  [this.pointer, tmpMemory.content.byteLength, startMemAddress]
);
C++側のバイト列をJavaScriptから参照する
Embindを使ってC++側のバイト列をJavaScript側から参照できるようにする。JavaScriptでは Uint8Array 型になるが、他の部分で処理しやすいように DataView として持つようにした。
// C++

#include <emscripten.h>
#include <emscripten/bind.h>
#include <emscripten/val.h>
using namespace emscripten;

unsigned char *buf;
size_t bufSize;

val getMemory() {
  return val(typed_memory_view(bufSize, buf));
}

// JavaScriptから直接参照できるようにする
EMSCRIPTEN_BINDINGS(interpreter_module) {
  function("getMemory", &getMemory);
}
// JavaScript

// wasmのメモリの参照を取得してフィールドに保存
const memoryUint8Array = Module.getMemory();
this.memory = new Memory();
this.memory.content = new DataView(memoryUint8Array.buffer, memoryUint8Array.byteOffset, memoryUint8Array.byteLength);
JavaScript側で malloc を呼び出してメモリを確保したけど、C++側で確保したメモリをEmbindでJavaScript側へ公開して、そこにアセンブル結果を書き込みする方が良いのかな?
C++側では配列ではなく vector で保持しようとしたのだけど、JavaScript側からC++側の関数を呼び出したときに保持していたはずのバイト列がなぜか初期化されてしまって上手くいかなかった。
おしまい
色々試行錯誤して動くものはできたけど、まだまだ不明点が多すぎますね。。深掘りしたい気持ちになったときに改めてチャレンジしよう!
Intel MacのUbuntu上でAndroid OSをビルドした
AOSP (Android Open Source Project) のCodelabがあるのでチャレンジしてみた日記です。
AndroidのBluetoothまわりを調べていてOSレイヤーの実装をいじってみたくなり、Android OSをビルドできる環境がないものかと考えてました。ビルド環境に求められる要件は以下に記載がありまして、macはダメ、64ビットCPU、ストレージ512GB、メモリ16GB(推奨64GB)という感じです。
Requirements | Android Open Source Project
手元にはちょうどいいマシンがなく、AWSでやるのが良いかなぁと思っていたのですが家でホコリをかぶってるIntel Macの存在に気がつきました!ストレージが不足していますが外付けSSDを接続してUbuntuをインストールすればいける気がする!
ということで無事ビルドできました。やったことは大きく2つです。
Intel MacでmacとUbuntuでデュアルブートできるようにする
ググるとやり方がたくさん出てくる。
外付けSSDにパーティション作ってUbuntu 18.04をインストールする。
初回Ubuntuインストール後、Wi-Fiを有効にしようとすると「No Wi-Fi Adapter Found」というエラーになってしまった。Ubuntu再インストールを試みてインストールウィザードの途中にあるWi-Fiドライバを探すオプションをONにすることで解決。
Ubuntu上でAndroid OSをビルドする
下準備
Codelabの手順に従って進めていく。
Android developer codelab | Android Open Source Project
必須パッケージをインストールする。問題なし。
repo クライアントをインストールする。問題なし。
repo を使ってソースコードをチェックアウトする。問題なし。
ビルド
ビルドを開始する!
$ source build/envsetup.sh
...

$ lunch aosp_cf_x86_64_phone-userdebug
...

$ m
...
soong bootstrap failed with: exit status 1
エラー!!
調べてみる。多分これと同じ。
メモリが足りないのだな。Codelabのビルド要件に、メモリ推奨64GBとあったのでswapを大きくすることで対応する。
$ sudo swapoff /swapfile
$ sudo fallocate -l 64G /swapfile
$ sudo mkswap /swapfile
$ sudo swapon /swapfile
ビルド再チャレンジ!
$ m

...

2023-10-31 09:19:41 - build_super_image.py - INFO    : Done writing image out/target/product/vsoc_x86_64/super.img
[100% 190384/190384] //frameworks/base/boot:platform-bootclasspath monolithic hi

#### build completed successfully (19:51:23 (hh:mm:ss)) ####
成功!20時間くらい・・・!
m コマンドの直前に実行した lunch aosp_cf_x86_64_phone-userdebug ですが、lunchでビルドする成果物のターゲット指定している。引数は <product_name>-<build_variant>というフォーマットで、<product_name>の部分で成果物であるOSを動かす端末の指定をする。
Building Android | Android Open Source Project
今回のCodelabではaosp_cf_x86_64_phoneとなっていて、cfというのはCuttlefishというローカルPC上でも動く仮想Androidデバイスを指定しているらしい。
Cuttlefishが起動しない
というわけで、Cuttlefishを動かす。が、起動しない・・・。事象としては以下と同じに見えるのだけど、試行錯誤したけど動かせなかった。
Error running local cuttlefish instance
AVDで動かす
アプローチを変えて、Androidアプリ開発でも使うエミュレータAVDで動かすことにする。
Using Android Emulator virtual devices | Android Open Source Project
ドキュメントを読むと<product_name>としてsdk_phone_x86_64を指定する必要があるらしい。<build_variant>が省略して書かれているのだけど開発用なのでengを指定することにした。
$ lunch sdk_phone_x86_64-eng
...

$ m
...

[100% 44917/44917] Create system-qemu.img now

#### build completed successfully (06:30:13 (hh:mm:ss)) ####
成功!ビルド時間が6時間に縮んだ理由は今のところ謎。
動かしてみる。
$ emulator
キタコレ!!!
おしまい
これでいつでもAndroid OSをいじいじできる...